---
source_url: "https://docs.kinde.com/authenticate/custom-configurations/custom-authentication-pages/"
title: Custom sign-up and sign-in pages - Kinde docs
mirrored_at: 2026-08-11T01:00:58.687Z
host: docs.kinde.com
cited_in_42a: true
mirror_canonical: "https://index.42a.ai/docs.kinde.com/authenticate/custom-configurations/custom-authentication-pages/index"
---
> **Original source:** https://docs.kinde.com/authenticate/custom-configurations/custom-authentication-pages/
You can host your own custom sign up and sign in pages to use with Kinde. Integrate your own designs for the initial sign up and sign in page, and still get the security of Kinde’s auth (and verification) process.
This gives you the best of both worlds: the security of hosted auth, and the ability to customize the initial sign-up experience for your users.
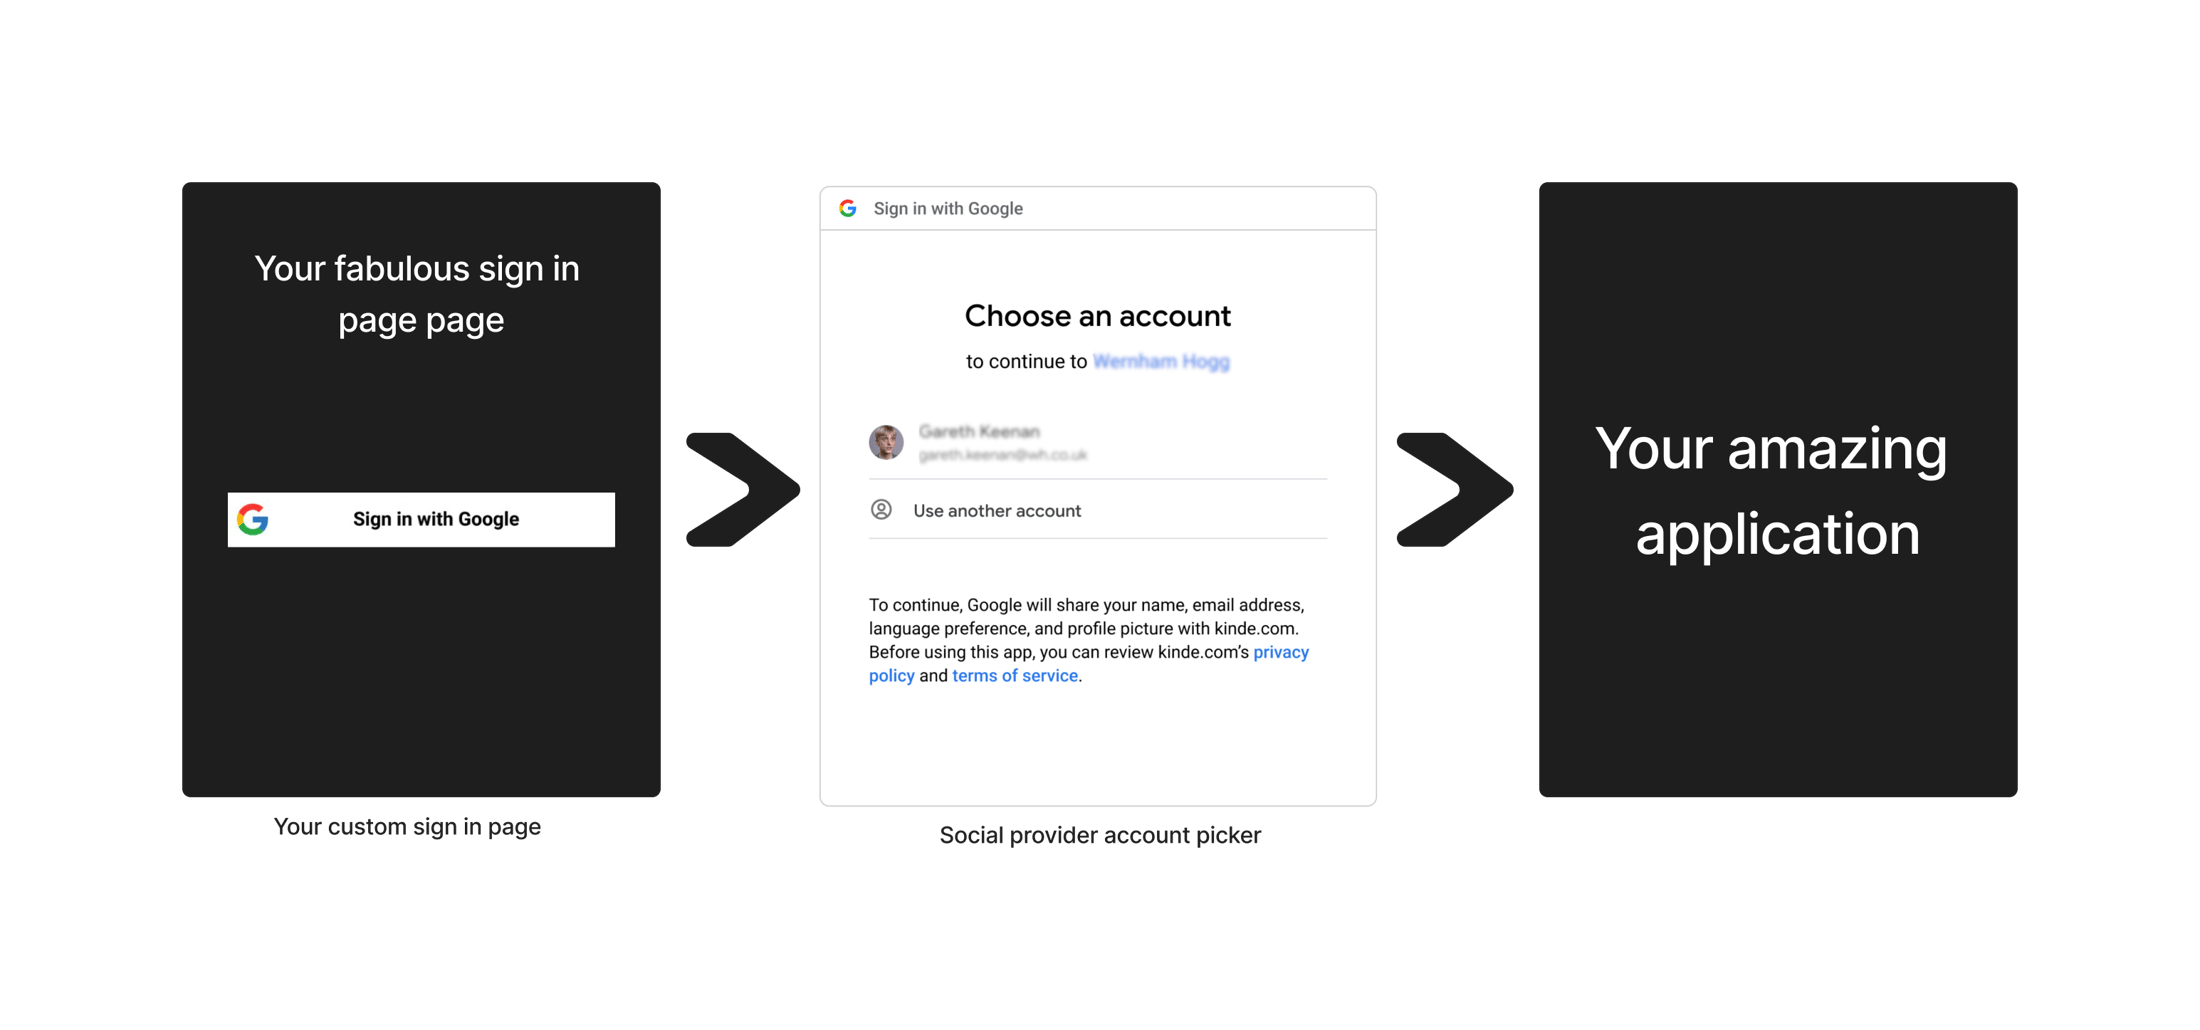
If you only allow users to sign up and sign in with social authentication - such as Google or Apple - then you can achieve a headless-type experience.
Users sign up or sign in from your custom screen, then get pushed straight through to the social provider’s account selection screen. For example:
## Custom sign in for email authentication
[Link to this section](#custom-sign-in-for-email-authentication)
If you allow email sign up and sign in, the initial Kinde screen can be bypassed, but the Kinde code verification screen will still appear before sign in is completed.
When a user signs up (say, via email), they do this in fields on your custom sign in screen. Then for verification, they see Kinde’s verification code screen. After that, it’s all you again.

## Screens that remain securely hosted by Kinde
[Link to this section](#screens-that-remain-securely-hosted-by-kinde)
This feature lets you to bypass Kinde’s initial sign in screens, but the following screens are still hosted by Kinde and are part of our secure auth experience.
- Enter password or One-time password (OTP) screens (see example above)
- Multi-factor authentication screens
- The organization switcher (if you support multiple organizations)
- The screen where users can choose to create an account if one was not found
## Step 1: Switch on the custom auth option for your application
[Link to this section](#step-1-switch-on-the-custom-auth-option-for-your-application)
1. Go to **Settings** > **Applications**.
2. Select **View details** on the application you want to switch on custom auth for.
3. Scroll down and switch on the **Use your own sign-up and sign-in screens** option in the **Authentication experience** section.
4. Select **Save**.
## Step 2: Get the auth method connection ID
[Link to this section](#step-2-get-the-auth-method-connection-id)
Each authentication type you have set up in Kinde has a unique **Connection ID** attached to it. You need to add this connection ID to your screen design code, so that the Kinde screens get bypassed when users interact.
1. Go to **Settings > Authentication.**
2. Select **Configure** on the relevant authentication method tile. For example, the **Google** tile under the **Social connections** section.
3. Copy the **Connection ID** and paste it somewhere you can access later.
4. Select **Save** or **Cancel**.
5. Repeat for each authentication method you want to be included on your custom sign in screen.
## Step 3: Add the Connection ID to your design code
[Link to this section](#step-3-add-the-connection-id-to-your-design-code)
There are different steps depending on the authentication method you use. Update your code for all that apply.
Add the `connectionId` to the auth url. Here is an example using React:
```
```
You can now test if it works by signing in to your project or app.
### Email sign in
[Link to this section](#email-sign-in)
Add the `connectionId` and `loginHint` params to the auth url.
The `login_hint` enables you to pre-populate the email for the user, skipping the step where they have to enter their identity/email. It also tells us where to send their one time password for passwordless verification.
Here is an example using React.
```
```
You can now test if it works by signing in to your project or app.
### Phone sign in
[Link to this section](#phone-sign-in)
Add `connectionId` and `loginHint` params to the auth url.
The `loginHint` enables you to pre-populate the phone for the user, skipping the step where they have to enter their phone number. It also tells us where to send their one time password for passwordless verification.
The `loginHint` needs to be in one of these formats `phone::` or `phone:<+intl_number>:`. The ‘+’ symbol is optional, as long as the country code is included.
Here is an example using React:
```
```
You can now test if it works by signing in to your project or app.
### Enterprise sign in (Entra ID or SAML)
[Link to this section](#enterprise-sign-in-entra-id-or-saml)
Add the `connectionId` to the auth url. This takes the user directly to the enterprise authentication process. Here is an example using React:
```
```